
Storing your sensitive files or data safely can feel like a challenging task. In an era where privacy breaches and unauthorized access to personal devices are not uncommon, it's crucial to adopt robust encryption solutions that protect your valuable information. This is where Veracrypt comes into play. By the end of this tutorial, you will have a solid understanding of how to create encrypted containers and how to mount and dismount them with ease.
What is VeraCrypt?
Veracrypt is an open-source disk encryption software that allows you to create encrypted containers or secure partitions to keep your files safe. With its simple interface and powerful security features, Veracrypt provides a secure and reliable solution for protecting your confidential files and data.
Whether you're a privacy-conscious individual, a professional handling sensitive information, or simply someone seeking robust data protection, Veracrypt is probably your best option.
Things know before you begin using VeraCrypt
Before you begin you journey with veracrypt it is important to understand couple of things.
Veracrypt offers two distinct options for creating hidden volumes. The first option, known as simple mode, involves safeguarding an encrypted container with a password of your choice.
Alternatively, the second option provides enhanced security. It allows you to create a concealed volume within an outer (dummy) volume. In the event that you are ever compelled to disclose the password for your encrypted volume, you can simply reveal the password for the outer volume while keeping your genuine personal files completely secure. To an outsider, there is no discernible difference between the regular and hidden volume, providing you with an additional layer of protection.
Furthermore, it is essential to bear in mind that Veracrypt is not a fail-safe solution. It is imperative to exercise caution and avoid reusing passwords. Neglecting to exercise caution renders any protective measures ineffectual.
How do i download Veracrypt?
Downloading VeraCrypt is a straightforward process. To begin, visit the Veracrypt download page, then select the VeraCrypt version applicable to your operating system. The good news is that VeraCrypt supports all major operating systems (Windows, macOS, Linux).
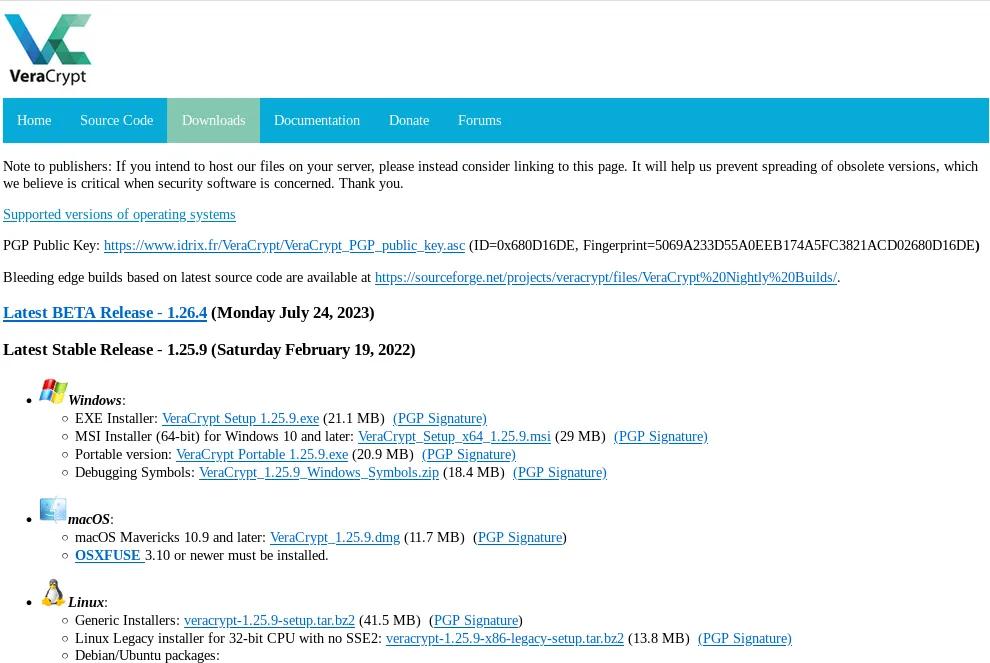
After the download completes, launch the file, and you'll be guided through the installation process step by step. Even better, no advanced knowledge is required as the installation instructions are straightforward and hassle-free.
How to create an encrypted Veracrypt container?
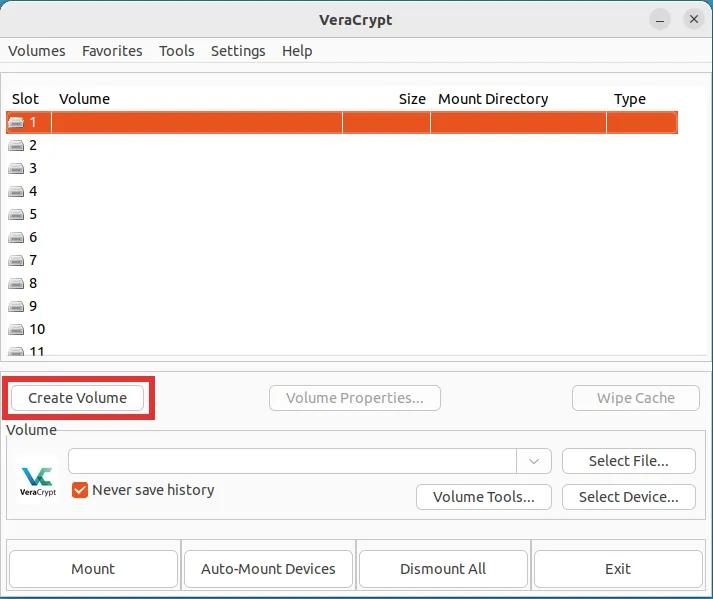
Step 1: Launch VeraCrypt and click the button labeled "Create Volume."
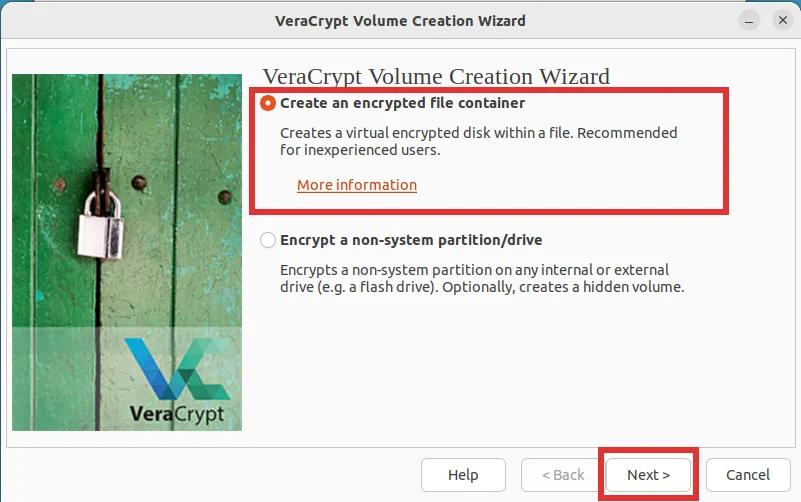
Step 2: Select the first option labeled "Create an encrypted file container" and click on "Next".
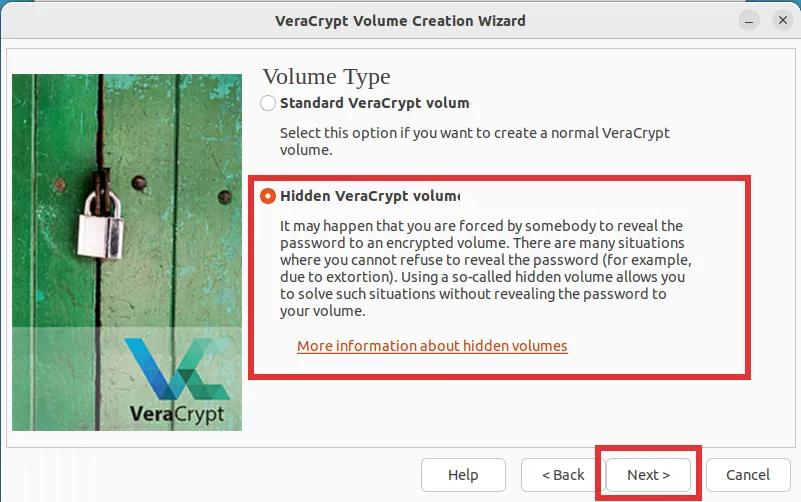
Step 3: We will be creating a "hidden VeraCrypt volume" for the sake of providing a comprehensive and detailed tutorial. However, the final decision is entirely up to you. After you've made a decision, click "Next".
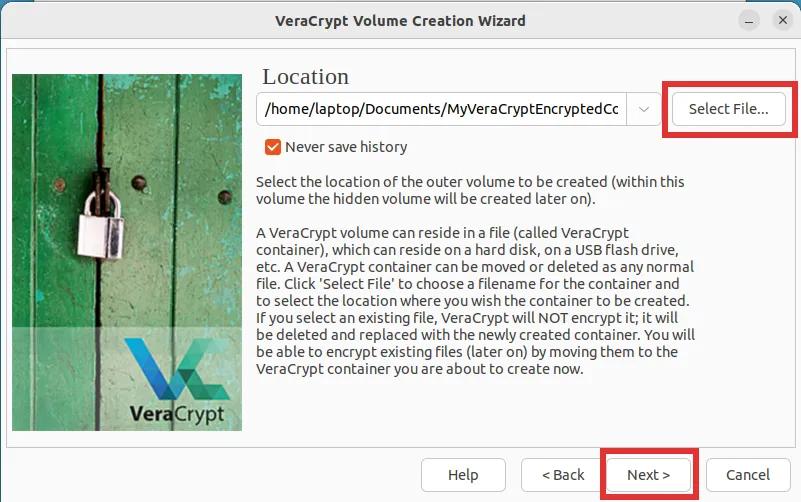
Step 4: Now, you need to choose the storage location for the VeraCrypt encrypted file container - this can either be on your computer or an external drive. To proceed, simply click the button labeled "Select File..." and select both the desired save location and the name of the container file. Once this is completed, click on the "Next" button to proceed to the next step.
Step 5: Feel free to proceed with the default settings for this step, as they are already perfectly suited for your needs. Simply click on the "Next" button to continue.
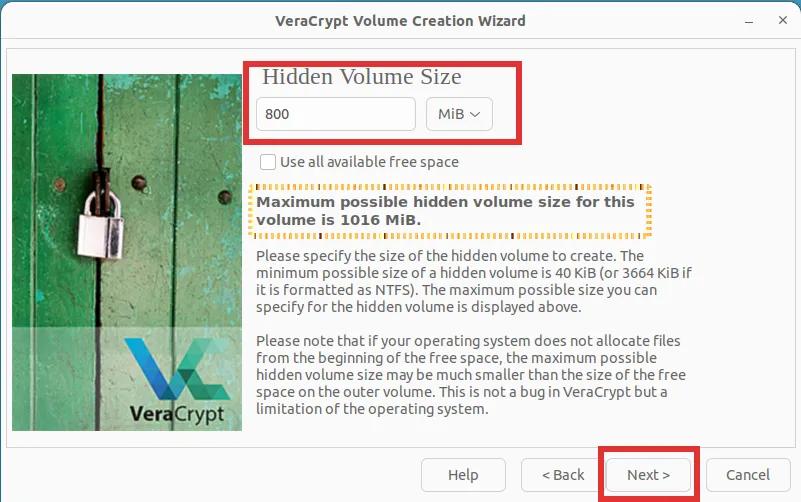
Step 6: In this step, you will need to choose the desired size for the outer encrypted volume. Keep in mind that the inner (hidden) volume will be located behind the outer (dummy) volume. As a result, no matter what size you select for the outer volume, the inner volume will be smaller in size.

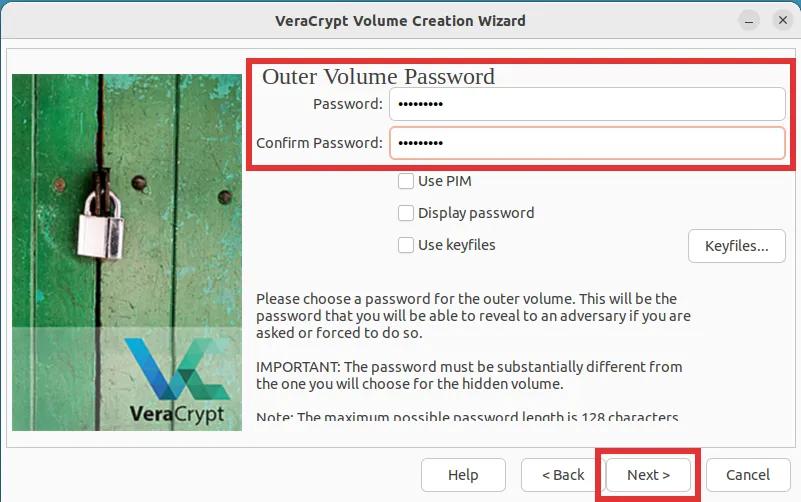
Step 7: Choose a password for the outer (dummy) volume, then click "Next".
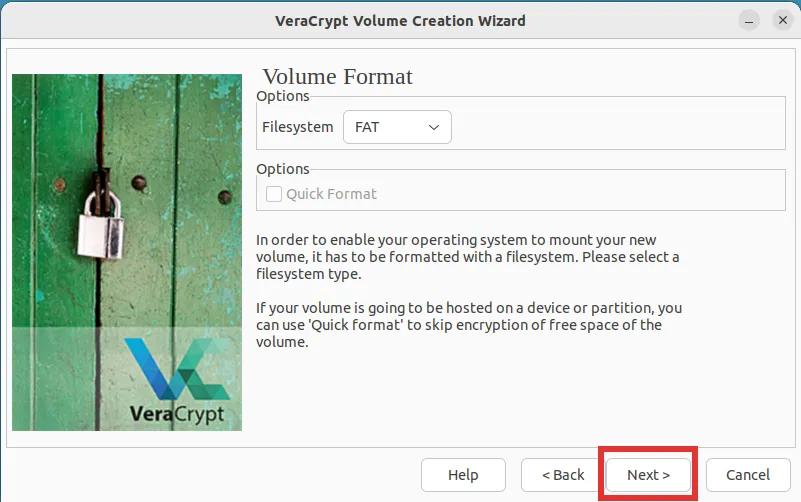
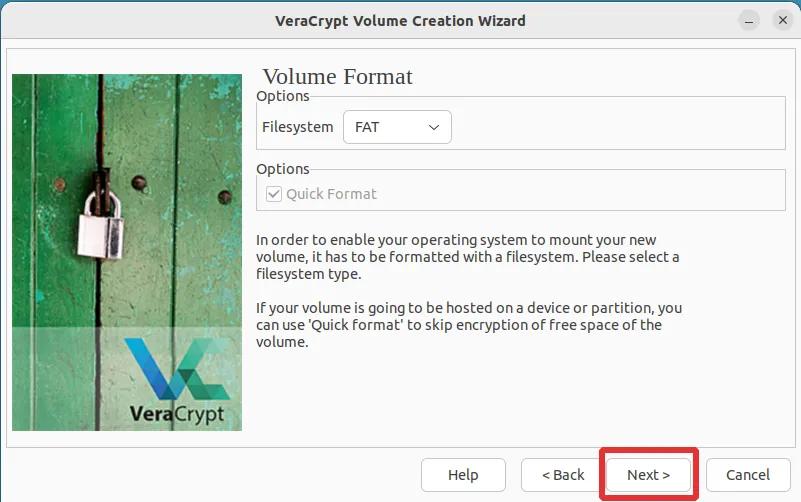
Step 8: You will be prompted to select the preferred file system for the outer volume. It is not critical which one you choose, simply click "Next" and proceed with the "FAT" file system.
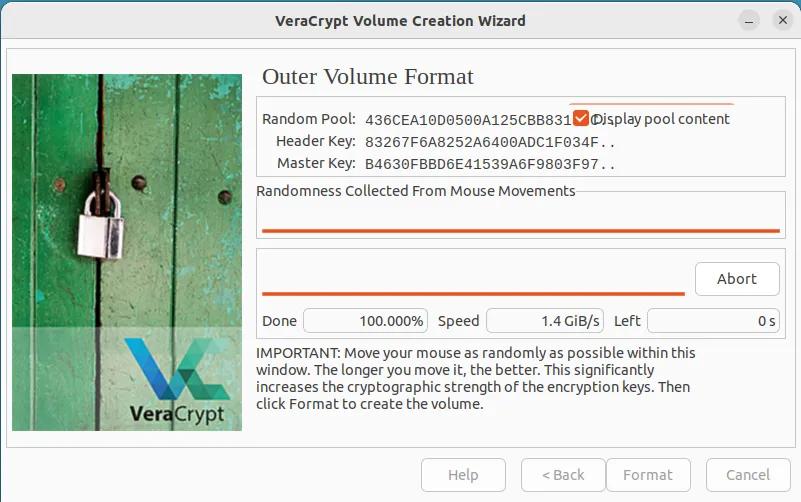
Step 9: This step is crucial and should be done correctly. Move your mouse cursor across the screen until the orange line under the label "Randomness collected from mouse movement" is fully filled up. After that, click "Format".

Step 10: For now, simply wait until your hidden volume is created and formatted. Please note that this process may require some time, as it is influenced by both the chosen volume size and the capabilities of your computer.
Step 11: After successfully creating the outer (Dummy/Bait) Volume, simply click on the "Open Outer Volume" button. This action will prompt a file explorer window to appear. In this window, you are advised to add a selection of moderately-sized files to the outer volume. Ensure that these files convey a sense of confidentiality, such as document scans or discreet pictures. In case you are ever forced to forfeit the password of your encrypted container, these are the files that will be revealed.
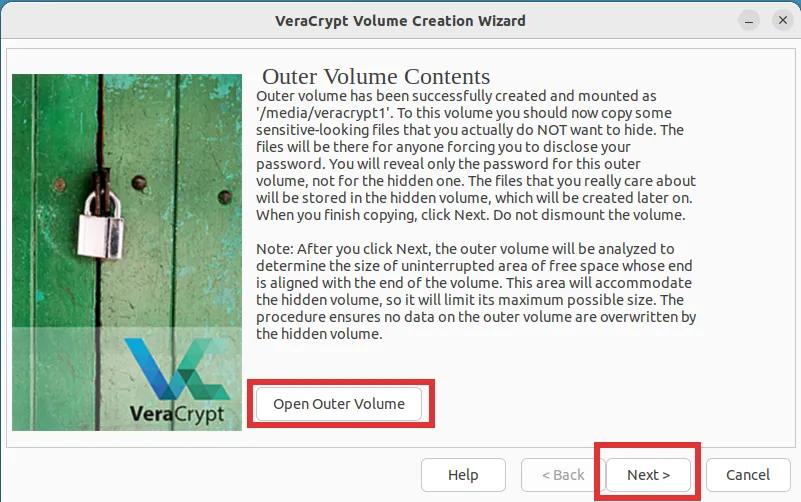
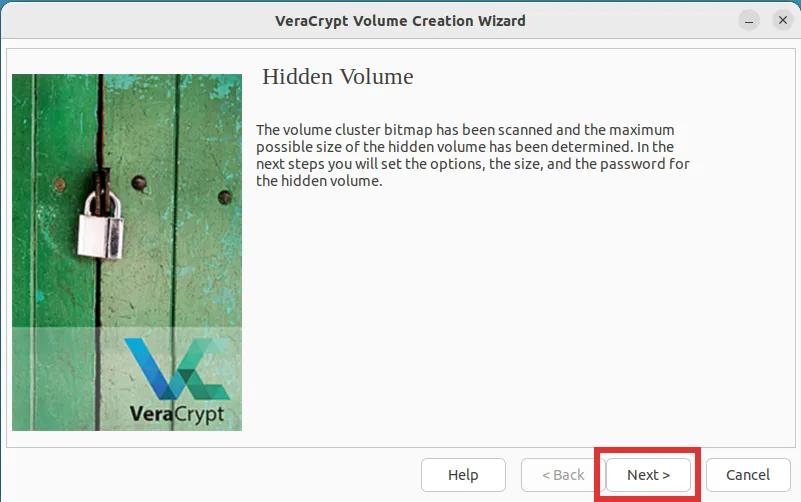
Step 12: You are now ready to create the inner (hidden) volume. Simply click on the button labeled 'Next'.
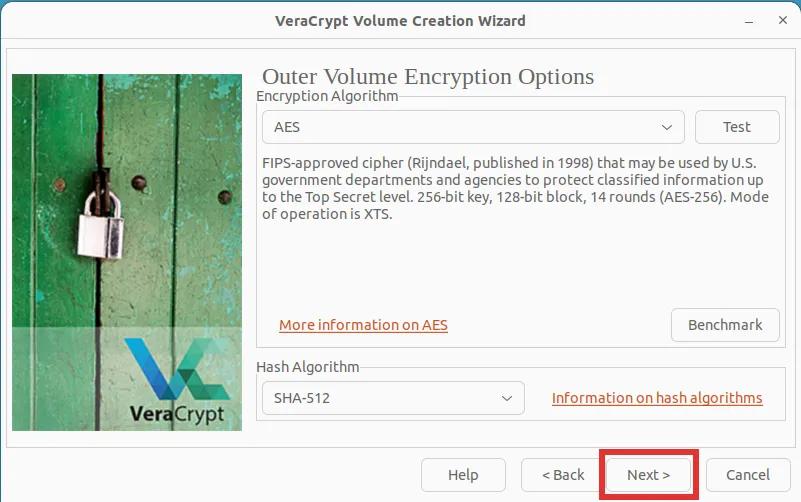
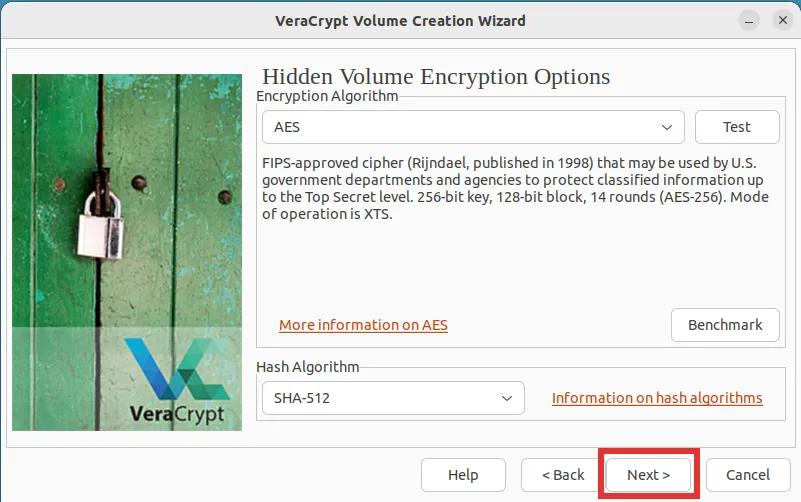
Step 13: Once again, you will be asked to choose your desired encryption and hash algorithms. The default options of AES and SHA-512 are more than sufficient.
Step 14: In this step, you will be asked to select the desired size of the inner volume. Please note the text in bold! Then click "Next".
Step 15: Choosing a strong password for your inner volume is crucial. Veracrypt highly advises using a password comprised of at least 20 characters. However, it is preferable to opt for one with approximately 30 characters to ensure future-proofing, considering the continuous advancement in computer processing speed. It's essential to recognize that a password considered strong today might not retain the same level of strength in the future.
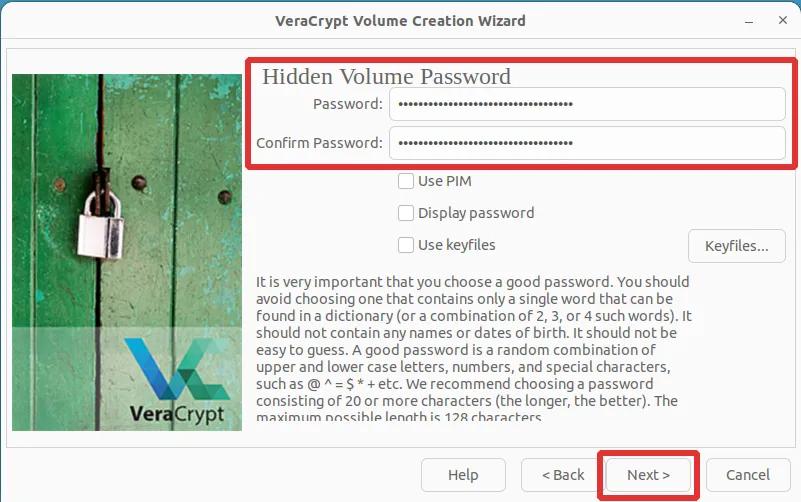
Step 16: Simply hit the button labeled "Next".
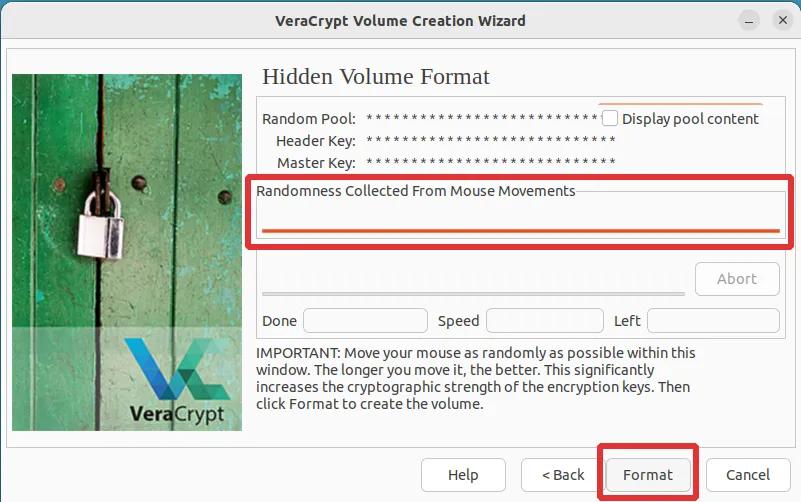
Step 17: We have once again reached the crucial step of collecting randomness needed to ensure strong encryption. As before, please move the mouse cursor across the screen until the line under the label "Randomness collected from mouse movement" is full. Once complete, click "Format".
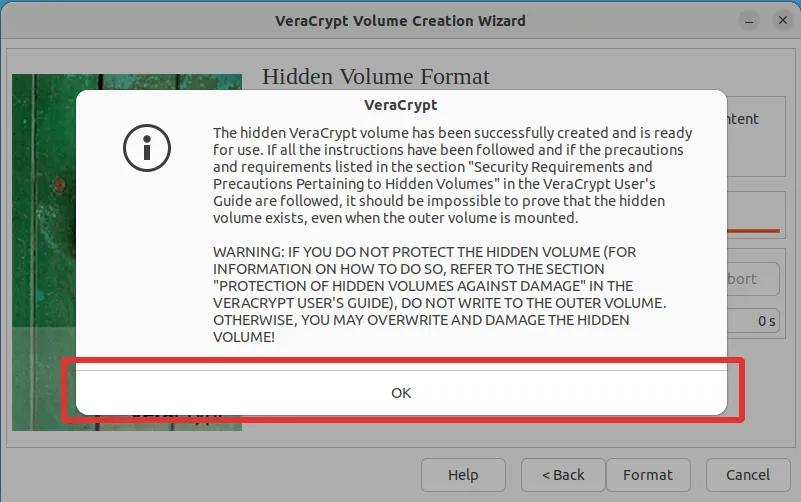
Step 18: The formatting process of the inner volume is typically instantaneous. Immediately after, you can expect to see a message resembling the images displayed below. Take utmost care to thoroughly read and understand the warnings provided. A critical notice highlighted in this warning is the importance of refraining from adding any new files to the outer (Dummy/Bait) volume, as doing so may result in the irreparable damage of files stored in the Hidden volume. Once you have carefully read and comprehended the warning, simply click "OK" to proceed.
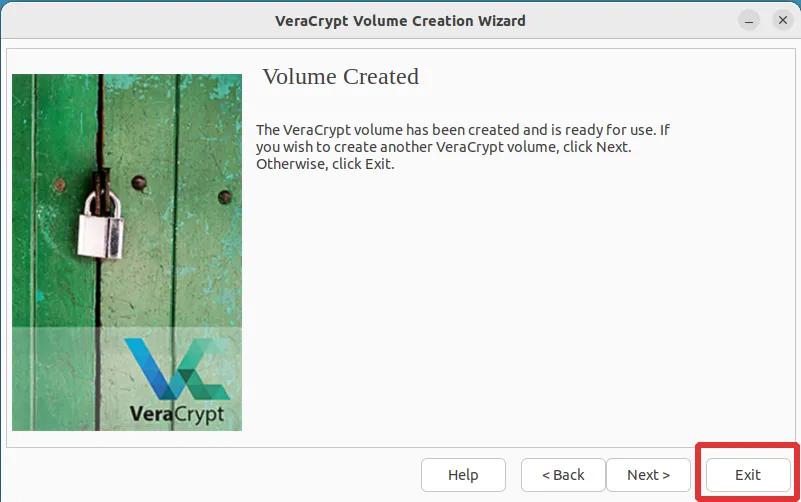
Step 19: Congratulations! You have successfully created an encrypted VeraCrypt container with a hidden volume. Now, simply click "Exit" unless you wish to create another container. In that case, click "Next" and follow the same instructions as before.
How do I mount my VeraCrypt Volume?
Fortunately, mounting the VeraCrypt volume is a straightforward process that only requires three steps.
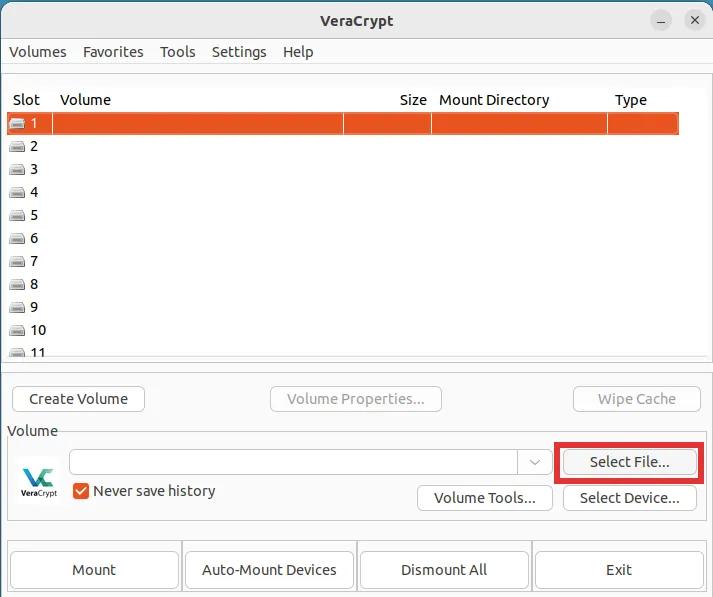
Step 1: Click on the button labeled "Select File...". This will open a File Explorer window. Simply navigate to and select the encrypted VeraCrypt volume that you created previously.
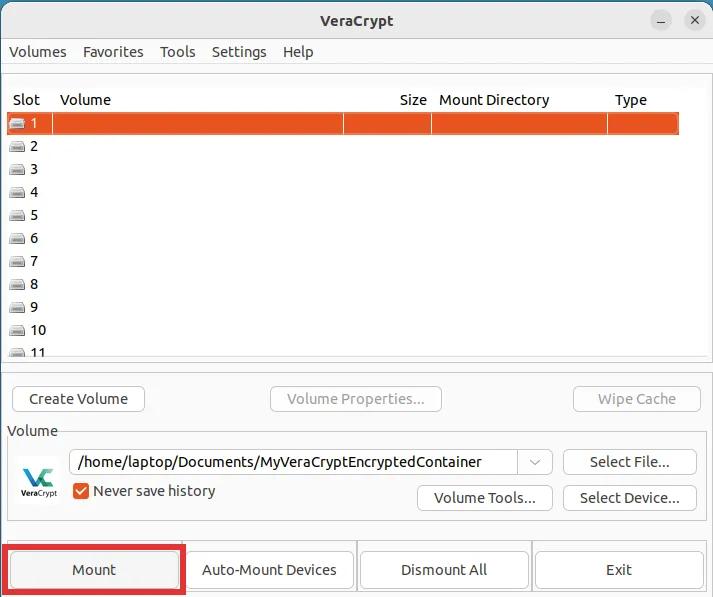
Step 2: Hit the big button labeled "Mount".
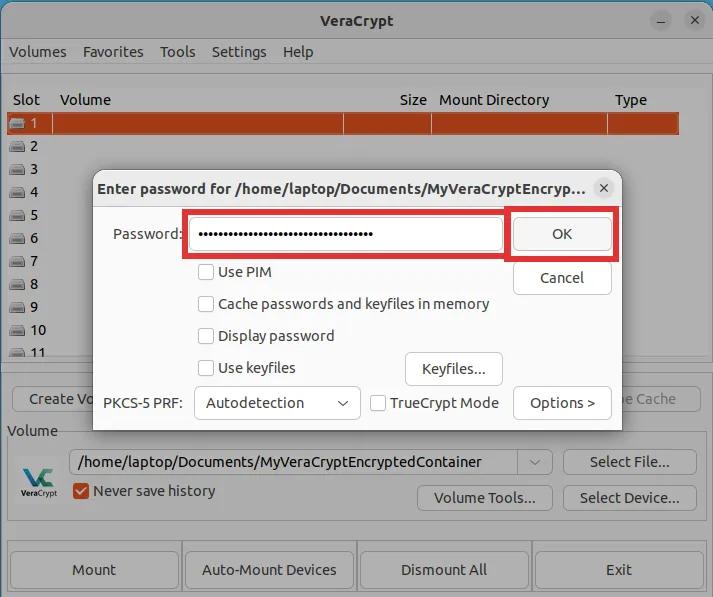
Step 3: A prompt will appear requesting you to enter the password. It is of utmost importance to remember that you must now enter and utilize your hidden volume. Ensuring the integrity of your data, please ensure that you do not overlook this vital step. Then click "OK".
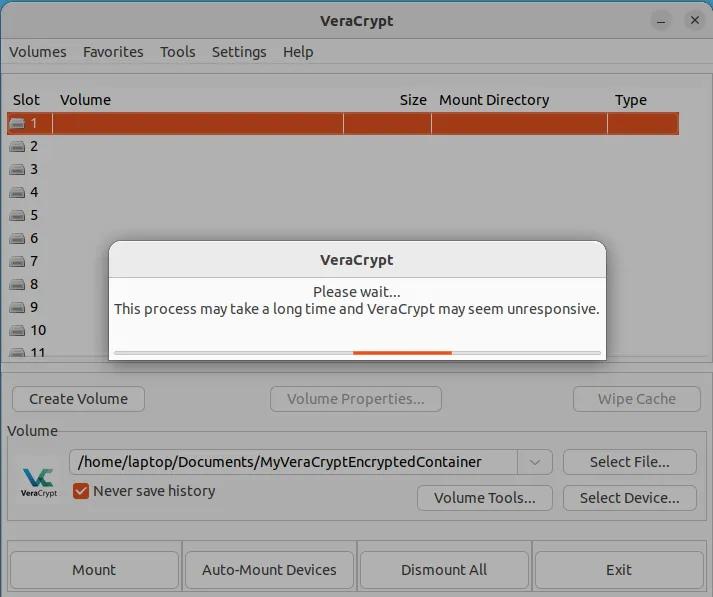
You should now see the following prompt telling you to wait until your volume is mounted. Please exercise patience as this process typically takes approximately 20 seconds, although the duration may vary depending on your computer's capabilities.
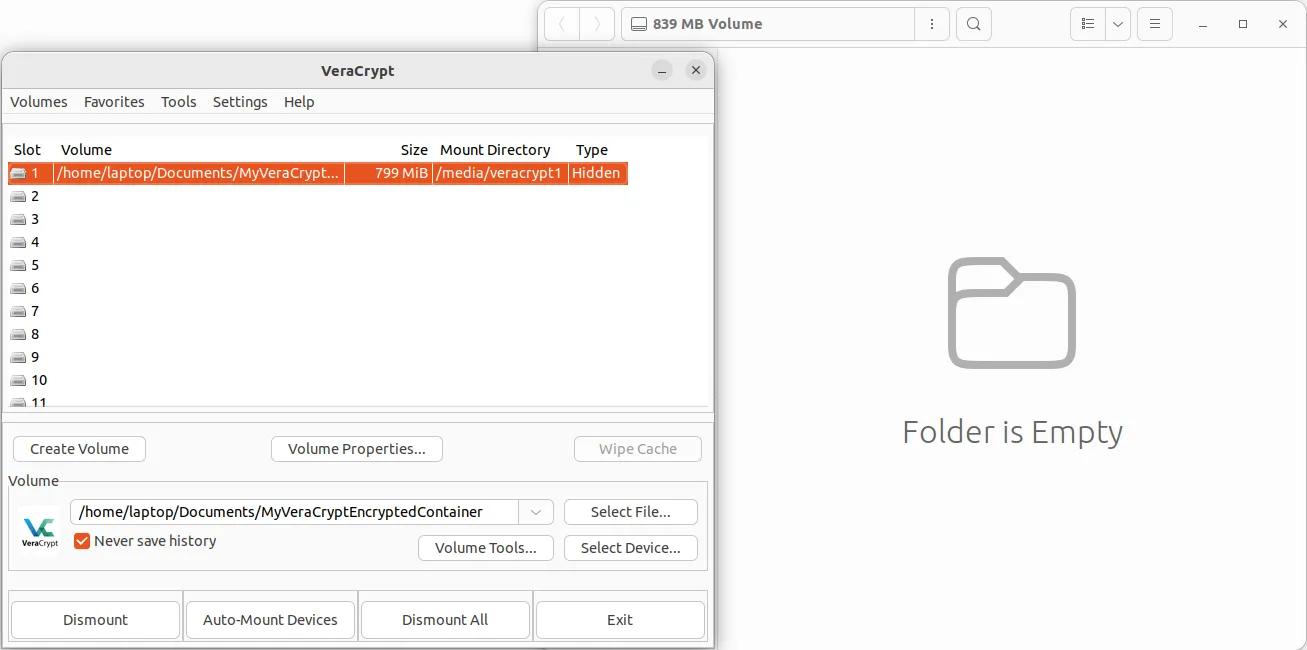
Once mounted, simply double-click on the slot where your volume is mounted. This should open the file explorer window. You are now ready to place your real confidential files in this virtual volume.
How do I dismount my VeraCrypt volume?
Dismounting is a simple one step process. Make sure the slot is selected, then hit the big button labeled "Dismount".


